
How to Spin Your Own Yarn at Home?
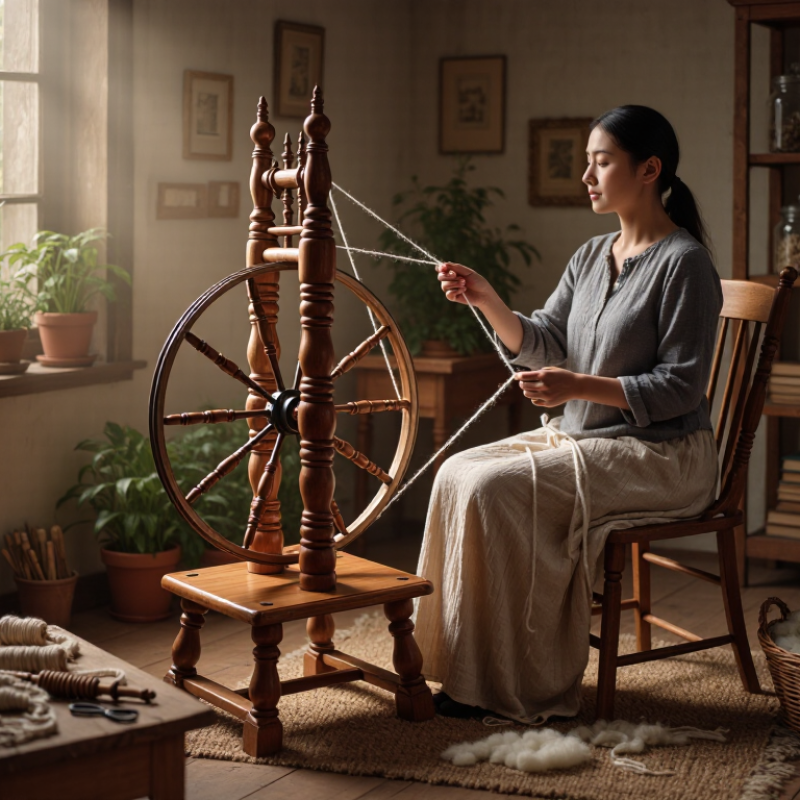
Learning to spin your own yarn at home begins with a quiet wheel, clean fiber, and realistic expectations. The first strand may look uneven. That is normal.
Maggie Casey, a respected spinning teacher and author of Start Spinning, often encourages beginners with this idea: “There is no wrong way to spin.” Her advice reflects the craft’s practical truth. Every thick section, loose twist, and sudden break provides useful information. A beginner can feel the fiber drag between the fingers, hear the wheel turn, and watch a soft roving strip become yarn.
This guide explains how to spin your own yarn with simple tools and careful technique. You will learn how to prepare wool, control drafting, manage twist, and correct common problems. We will discuss drop spindles and spinning wheels, including their different learning curves. A small sample can reveal more than a full skein. Make one before buying large quantities of fiber.
Good yarn depends on more than speed. Fiber length, moisture, wheel tension, and hand position all matter. Beginners often over-twist their first yarn. I did too. The result felt wiry and curled tightly after washing. That mistake taught me to slow down and check the twist regularly.
Reliable practice also requires safe habits. Keep loose clothing away from moving parts, and store sharp tools responsibly. Use trusted fiber suppliers and confirm material details before spinning. With patience, observation, and honest experimentation, home spinning becomes a practical skill rather than a mysterious talent. Your first yarn may be imperfect. It may also be uniquely yours.
Choosing Fiber, Tools, and a Suitable Spinning Method
Choosing fiber is the first practical decision. Textile Exchange’s Materials Market Report 2024 estimates global fiber production reached 124 million tonnes in 2023. Polyester represented about 57% of output, while wool remained a small specialty fiber. For hand spinning, fiber length matters more than popularity. Short cotton fibers need controlled drafting and a fine spindle. Medium wool is more forgiving. Flax often feels crisp and resists careless handling. Touch the staple before buying. Does it separate smoothly, or clump like damp grass?
Keep the tools simple: prepared fiber, a supported or drop spindle, hand cards, and a swift. A spinning wheel can increase production, but it also magnifies uneven drafting. The spindle teaches twist with fewer moving parts. Test a small lock first. If fibers pull apart too easily, add twist gradually. Excess twist creates a wiry yarn. Not enough twist creates weak sections. My own preference would be to start with a medium-staple wool, although that choice may hide useful lessons from difficult fibers.
Your method should match the yarn’s purpose. Short fibers suit a woollen draft, producing warmth and loft. Longer, aligned fibers suit a worsted draft, producing smoother, denser yarn. The International Wool Textile Organisation reports wool remains valued for resilience, moisture management, and thermal performance, but hand-spun results still depend on preparation. Record fiber type, spindle weight, twist direction, and sample length. The first skein may look irregular. That is useful evidence, not failure.
How to Spin Your Own Yarn at Home? - Choosing Fiber, Tools, and a Suitable Spinning Method
| Fiber | Typical Staple Length | Fiber Character | Preparation | Recommended Method | Suitable Beginner Project |
|---|---|---|---|---|---|
| Wool | Approximately 25–200 mm, depending on breed | Elastic, crimpy, resilient, and generally easy to draft | Separate locks, gently open, and align or mix fibers as desired | Short-draw or supported long-draw | Warm hat, scarf, or beginner's sample skein |
| Alpaca | Approximately 75–200 mm | Soft, smooth, warm, and usually less elastic than wool | Open carefully; remove coarse guard hair when present | Short-draw with controlled tension | Soft cowl or blended yarn |
| Cotton | Approximately 10–40 mm | Short, smooth, low-crimp, and less forgiving while drafting | Use prepared sliver or roving; keep drafting zone small | Short-draw with high, steady twist | Lightweight dishcloth or small sample |
| Flax | Approximately 20–40 mm when processed as line flax | Strong, crisp, smooth, and relatively inelastic | Dampen the fibers for traditional wet spinning; keep fibers aligned | Short-draw, commonly wet-spun | Durable cord, lace yarn, or household textile |
| Silk | Filaments can extend from hundreds of meters to over 1,000 m | Smooth, lustrous, strong, and slippery | Keep the preparation compact; avoid excessive pulling | Short-draw for tops; minimal-draft spinning for filament silk | Fine shawl yarn or decorative accent |
| Hemp | Approximately 20–50 mm when processed as staple fiber | Strong, coarse to medium, and low in elasticity | Open thoroughly and remove hard woody fragments | Short-draw with firm, consistent twist | Rug yarn, cord, or sturdy utility textile |
Home Spinning Tools and Their Uses
| Tool | Main Function | Best Use | Learning Consideration |
|---|---|---|---|
| Drop spindle | Creates twist using a suspended, rotating spindle | Portable practice and small quantities of yarn | Requires control of spindle momentum, drafting, and yarn storage |
| Spinning wheel | Uses treadling to rotate a flyer or spindle | Faster production and longer spinning sessions | Needs adjustment of drive ratio, tension, and treadling rhythm |
| Hand cards | Opens, cleans, and blends short or crimpy fibers | Creating a lofty, mixed-color rolags | Use light pressure to avoid damaging or compacting fibers |
| Combs | Aligns long fibers and removes shorter material | Smooth, worsted-style preparation | Sharp tines require careful handling and secure placement |
| Niddy-noddy | Winds finished yarn into a measured skein | Estimating yarn length and preparing it for washing | Keep winding tension even for more reliable length estimates |
| Yarn swift and ball winder | Supports skeins and forms organized yarn balls | Storing yarn and preparing singles for plying | Avoid excessive tension, which can stretch freshly spun yarn |
Spinning Method Comparison
| Method | Drafting Direction | Yarn Appearance | Recommended Fibers | Main Advantage |
|---|---|---|---|---|
| Short-draw | Fibers are controlled close to the forward hand | Smooth, compact, and relatively firm | Wool tops, cotton, flax, hemp, and silk tops | Provides precise control of thickness and twist |
| Supported long-draw | The fiber supply is supported while twist travels into a wider drafting zone | Airy, lofty, and often more textured | Carded wool and other springy, crimped fibers | Creates warm yarn with good loft and elasticity |
| Long-draw | Fibers are drawn back from the twist zone in a longer movement | Light, lofty, and sometimes irregular | Carded wool and textured art-fiber blends | Efficient for producing soft, woolen-style yarn |
| Supported spinning | The spindle rests on a surface or in a small support while fibers are drafted | Fine, controlled, and suitable for delicate fibers | Silk, fine wool, and short-staple fibers | Reduces hand fatigue and improves control of fine singles |
| Wet spinning | Moistened fibers are drafted while twist is inserted | Smooth, firm, and more lustrous | Flax and some other bast fibers | Helps align fibers and produces a smooth durable yarn |
General starting guide: Begin with prepared wool roving, a drop spindle, and a short-draw technique. Practice producing an even single, then allow the yarn to rest before plying and washing it to balance the twist.
Related Posts
-
How to Choose the Best Yarn Spinning Equipment?
-
What Is the Best Yarn Spinning Equipment in 2026?
-
Why Choose an Automatic Yarn Spinning Machine?
-
Top 10 Types of Industrial Wool Spinning Machines
-
2026 Top Automatic Yarn Spinning Machine Types?
-
Top 10 Spinning Machines for Yarn: An Ultimate Guide for Efficient Production